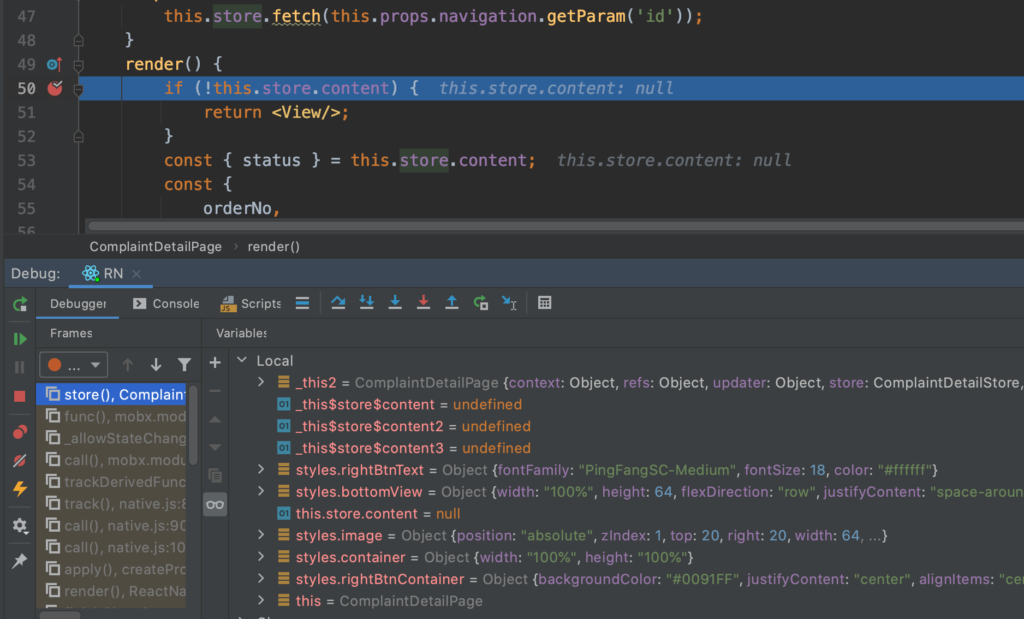
本文使用IntelliJ IDEA Ultimate 2020.2作为开发环境,最终实现的目标是,能够在IDE内部实现断点调试,而不需要在Chrome中断点调试
1. IDE推荐无脑使用IntelliJ IDEA,WebStorm应该类似,这样可以直接在IDE内部像运行原生Android应用一样,通过点击Run/Debug按钮来一次性实现yarn react-native start、yarn react-native run-android命令。并且还可以查看log、断点调试。之前尝试过vscode集成react native tools插件,也还行,但是vscode因为是轻量向,所以各种高级功能需要去摸索对应的插件来实现,所以我个人更倾向于把vscode当做轻量编辑器来用。http://www.jetbrains.com/help/idea/react-native.html
2. Edit Configuration中增加新的配置项,选择React Native,然后可以依次增加三个配置项,分别命名为Android、iOS、RN。Android和iOS的作用是编译原生代码=>bundle RN代码=>运行APP。RN的作用是,只在电脑上开启Metro服务,既不编译原生代码,也不bundle js代码,方便已经在运行的APP,直接连接电脑上的Metro服务,进行js代码的断点调试。

3. 默认启动Activity为包名.MainActivity,如果启动Activity改了名字,或者不在这个路径,就会无法启动。正确的做法是在run-android的运行命令后面增加参数:–main-activity。对应到IDEA中,就是在Configuration中的Arguments中增加–main-activity XXX,其中XXX为启动Activity的完整包名去掉应用包名的部分。
具体可以通过run-android –help命令来查询:
builds your app and starts it on a connected Android emulator or device

Options:
  --root [string]           Override the root directory for the android build (which contains the android directory) (default: "")
  --variant [string]        Specify your app's build variant (default: "debug")
  --appFolder [string]      Specify a different application folder name for the android source. If not, we assume is "app" (default: "app")
  --appId [string]          Specify an applicationId to launch after build. (default: "")
  --appIdSuffix [string]    Specify an applicationIdSuffix to launch after build. (default: "")
  --main-activity [string]  Name of the activity to start (default: "MainActivity")
  --deviceId [string]       builds your app and starts it on a specific device/simulator with the given device id (listed by running "adb devices" on the command line).
  --no-packager             Do not launch packager while building
  --port [number]            (default: 8081)
  --terminal [string]       Launches the Metro Bundler in a new window using the specified terminal path. (default: "iTerm.app")
  --tasks [list]            Run custom Gradle tasks. By default it's "installDebug"
  --no-jetifier             Do not run "jetifier" – the AndroidX transition tool. By default it runs before Gradle to ease working with libraries that don't support AndroidX yet. See more at: https://www.npmjs.com/package/jetifier.
  -h, --help                output usage information
✨  Done in 0.56s.
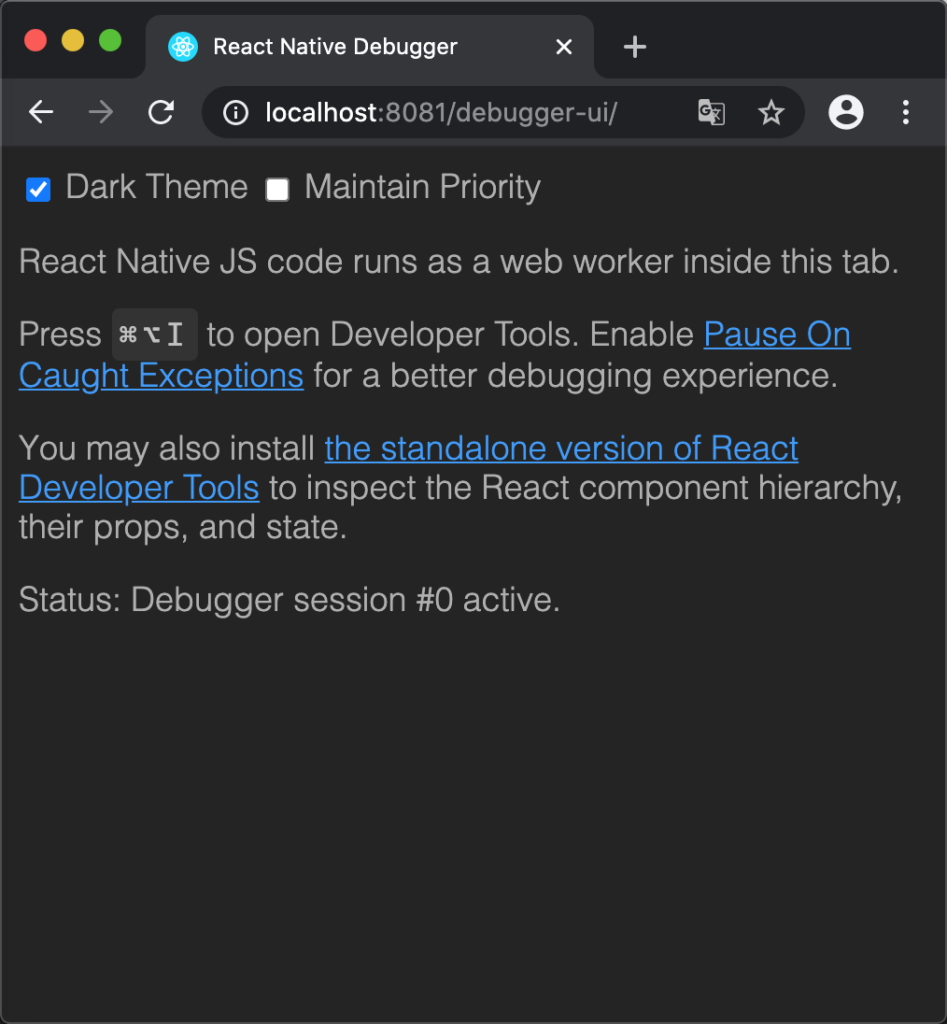
4. Debugger可以使用React Native Debugger,不过有个问题是,React Native Debugger与IDEA的debug功能冲突。在IDEA内通过点击debug按钮使用调试模式启动时,会主动弹出一个Chrome窗口来运行RN自带的Debugger,如果关掉,再使用React Native Debugger,会导致IDEA的debug失效,无法继续使用IDEA进行断点调试,IDEA的debug本身貌似是通过websocket与Chrome中的Debugger通信的。https://github.com/jhen0409/react-native-debugger
使用Chrome来debug:
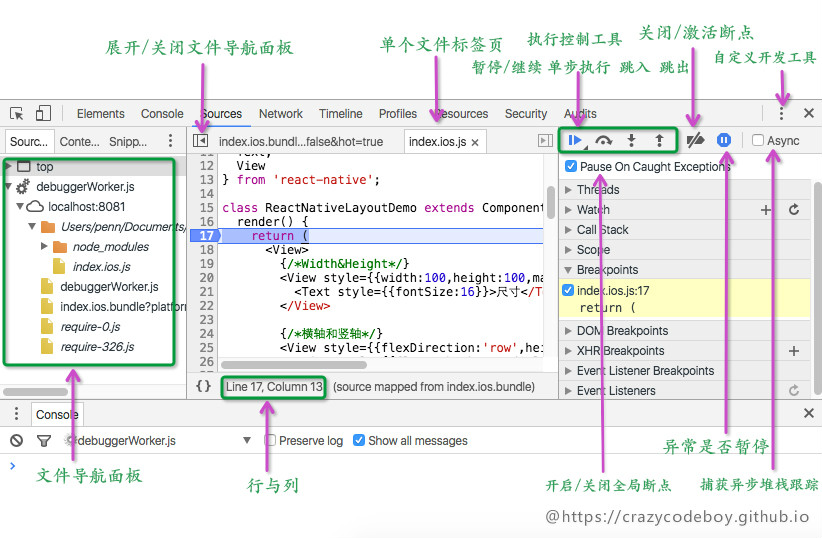
使用React Native Debugger:

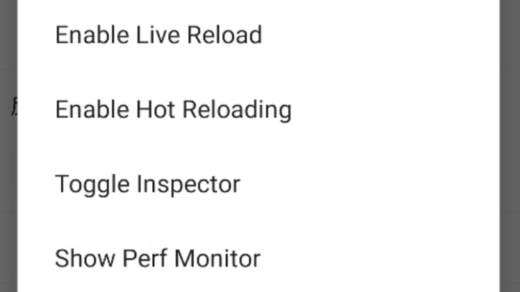
5. 如果使用安卓真机debug,需要使用adb命令:adb reverse tcp:8081 tcp:8081。之后需要通过菜单键或者摇晃手机打开APP上的菜单,点击Debug JS Remotely。而现在很多真机没有菜单键,为了打开APP上的调试菜单,需要使用adb发送按键事件:adb shell input keyevent 82。
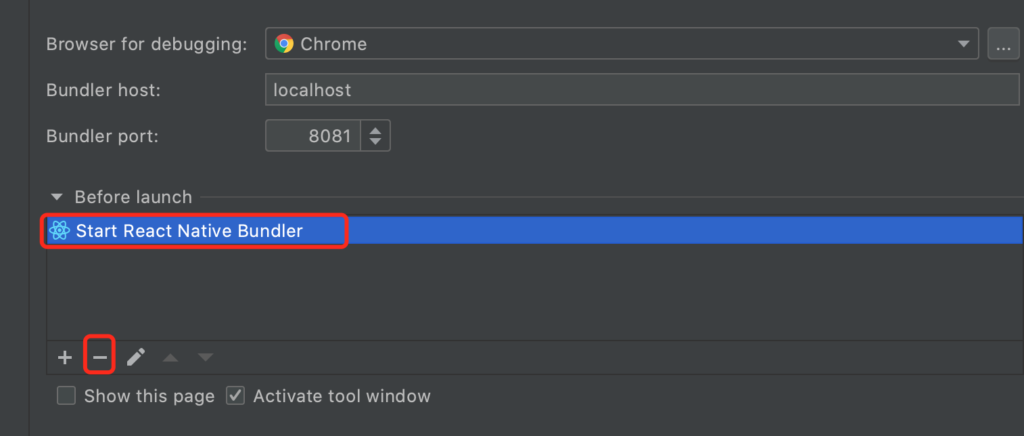
6. 前面创建了三个Configuration,默认任何一个debug前或者run前,会自动运行bundle、build、launch。此时如果我们已经在命令行中通过yarn start运行了Metro服务(开发过程中Metro服务一般都是持续开着的),而不想在每次debug前自动开启服务,可以编辑上面创建的RN这个Configuration,在Before launch中选中Start React Native Bundler,再点击减号,并保存。之后选中RN,并点击debug,就不会在每次debug前自动运行Bundler重新打包js代码了。https://www.jetbrains.com/help/idea/react-native.html#ws_react_native_run_and_debug
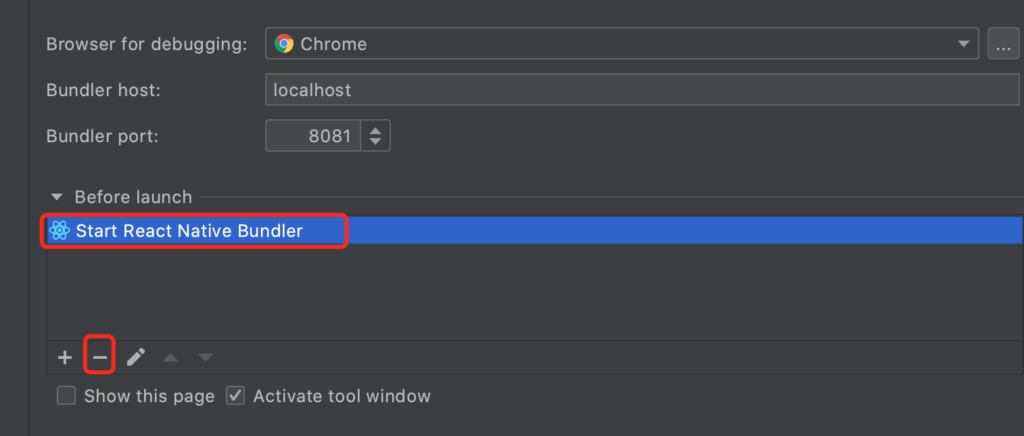
7. 默认run或者debug前,会自动build原生代码并安装并重新启动。如果我们没有修改原生代码,只是想使用已经启动的APP来调试,可以编辑上面创建的RN这个Configuration,去掉Build and launch application的勾。之后点击Run右边的Debug按钮,就可以在不编译运行重启APP的情况下,直接对js代码进行debug

8. iOS在开启Debug JS Remotely后,有时候会出现ERROR:Runtime is not ready for debugging。此时关掉Debug JS Remotely再打开,再Reload一次就能解决
结论:
配置完成后,Android、iOS、RN三个Configuration应该是这样的:
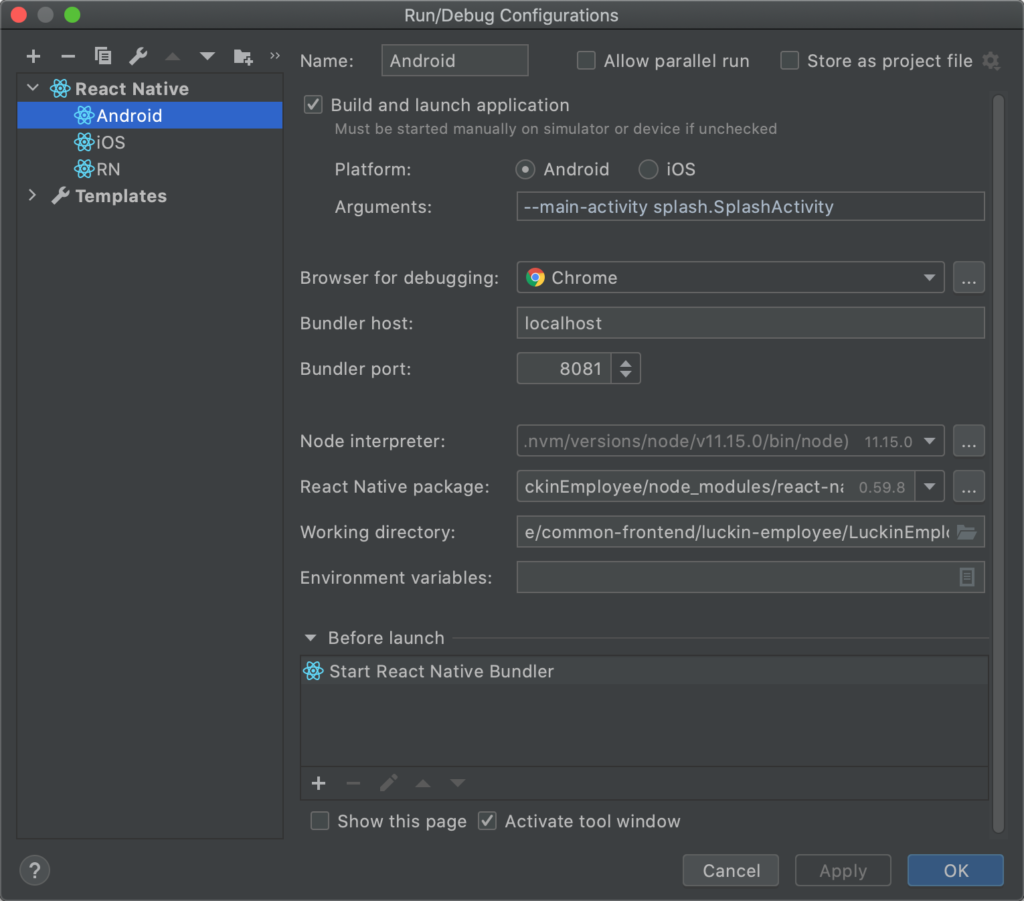
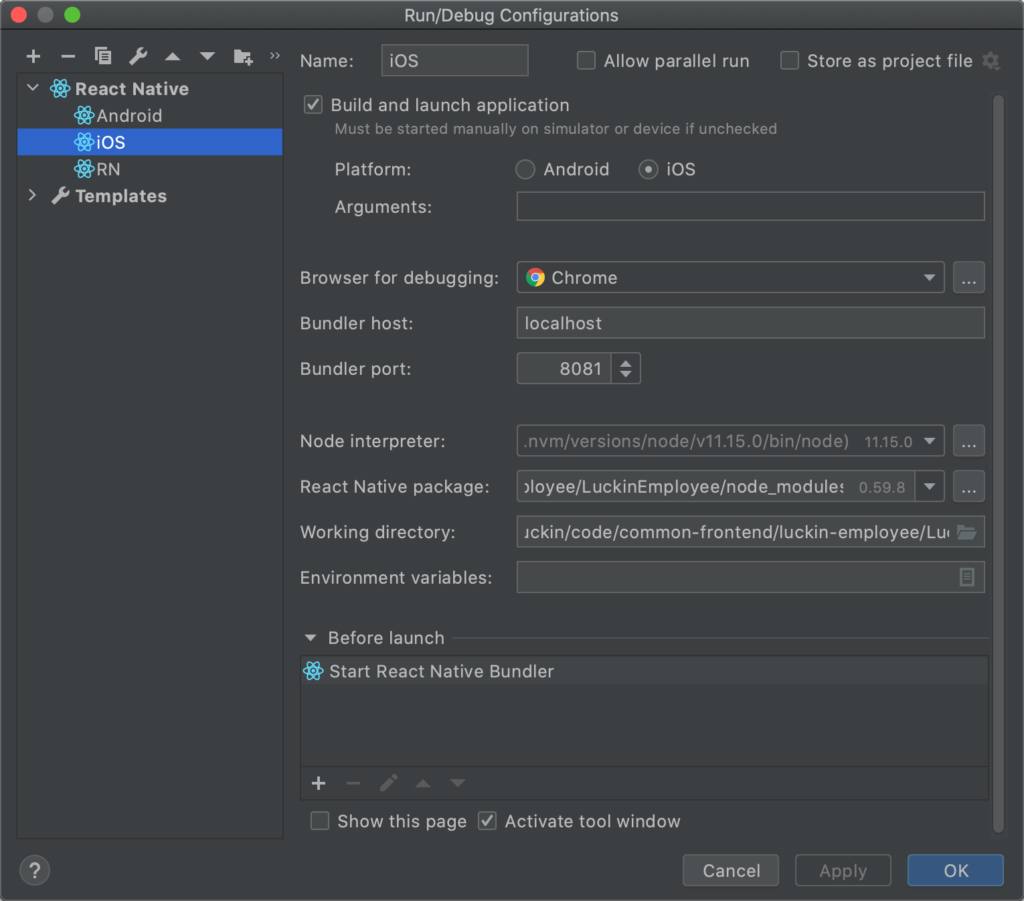
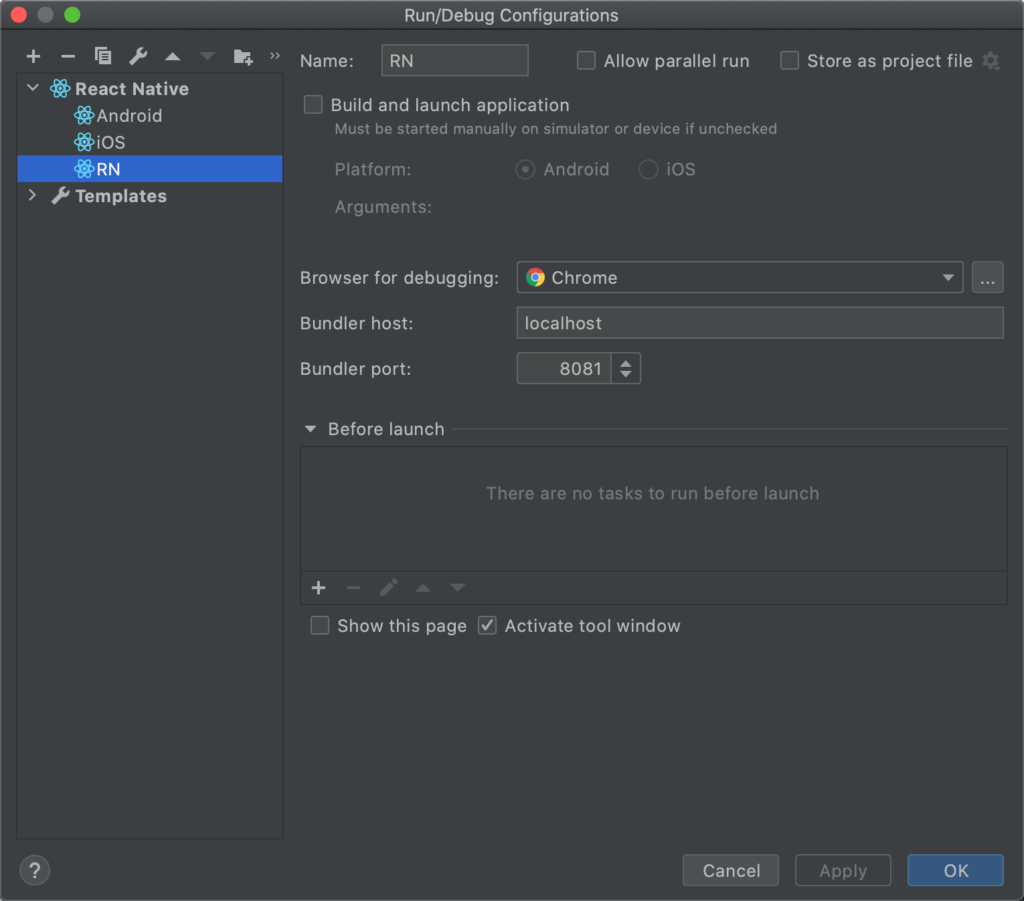
在手机上已经安装了APP的情况下,根据上述方案配置完成后,一次完整的debug过程如下:
1. terminal中输入 yarn start 启动Metro服务,此时Metro服务的ip为本机ip
yarn start
yarn run v1.22.0
$ node node_modules/react-native/local-cli/cli.js start
┌──────────────────────────────────────────────────────────────────────────────┐
│                                                                              │
│  Running Metro Bundler on port 8081.                                         │
│                                                                              │
│  Keep Metro running while developing on any JS projects. Feel free to        │
│  close this tab and run your own Metro instance if you prefer.               │
│                                                                              │
│  https://github.com/facebook/react-native                                    │
│                                                                              │
└──────────────────────────────────────────────────────────────────────────────┘

Looking for JS files in
   /Users/wuzongheng/DEV/luckin/code/common-frontend/luckin-employee/LuckinEmployee

Loading dependency graph, done.
2. APP通过摇晃或者菜单键唤出调试菜单,Dev Settings -> Debug server host & port for device -> 输入:Metro服务ip:8081

3. APP通过摇晃或者菜单键唤出调试菜单,点击Debug JS Remotely

4. 选择RN,点击RUN右边的DEBUG按钮,此时会自动打开IDEA的调试窗口,并启动一个Chrome的实例,并自动跳转http://localhost:8081/debugger-ui/

5. APP通过摇晃或者菜单键唤出调试菜单,点击Reload,此时会连上Debugger
6. 自动命中IDE中设下的断点,并可查看变量
